A simple tutorial on Petri nets, originally published in French on Twitter and Mastodon
Petri nets
Chapter 2: Why?
Where we learn what a Petri net is used for.
We generally use Petri nets to make models.
No, not you sir; please let us work.

A model is a simplification of a system whose study is not easy.
The model being simpler, it is simpler to analyse.
Conclusions about the model can be transferred to the system.
For instance, in biology, the mouse is a model for humans.

We cannot easily test new treatments on humans, but it is easier to do it on mice, and we can draw conclusions about the effect of the treatment on humans.
With Petri nets, one can build models of diverse systems: critical systems, security protocols, biological systems, ecosystems, etc.
But Enough chatter, here is a system to study.
This is a critical system: it’s operation puts human lives at stake.
This is a very classical toy system (ah ah) because it is pretty simple.
Trains run on a track that crosses a road.
Gates must close as the train passes to avoid collisions with cars.
An easy solution is to leave the gates always closed.
But let’s not take the easy way out.
So, here is a model for the gates.
They can be up or down.
Two transitions take care to close or open them.
And here is a model for the track and the train.
We model three crucial positions, abstracting the others away.

In the complete model, these two parts communicate through places that allow the track to ask the gates to open or close.
Let’s look at it working.
We win!
Let’s fill a patent and sell our design to a train company.
We’ll be millionaires.
…
Really?
Didn’t we forget something?
Let’s start again.
A model simplifies the reality. That’s done.
It can be analysed. Is that done or not?
Of course not!
What we did is just to execute a correct sequence of actions.
We just proved the model can have the desired behaviour.
We never proved it has no bad behaviour.
To prove there is no faulty behaviour, we shall compute the marking graph and check that no discovered marking has a token in place inside without a token in place down.
Let’s go!
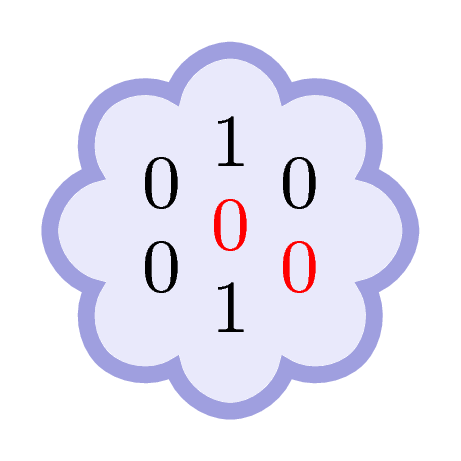
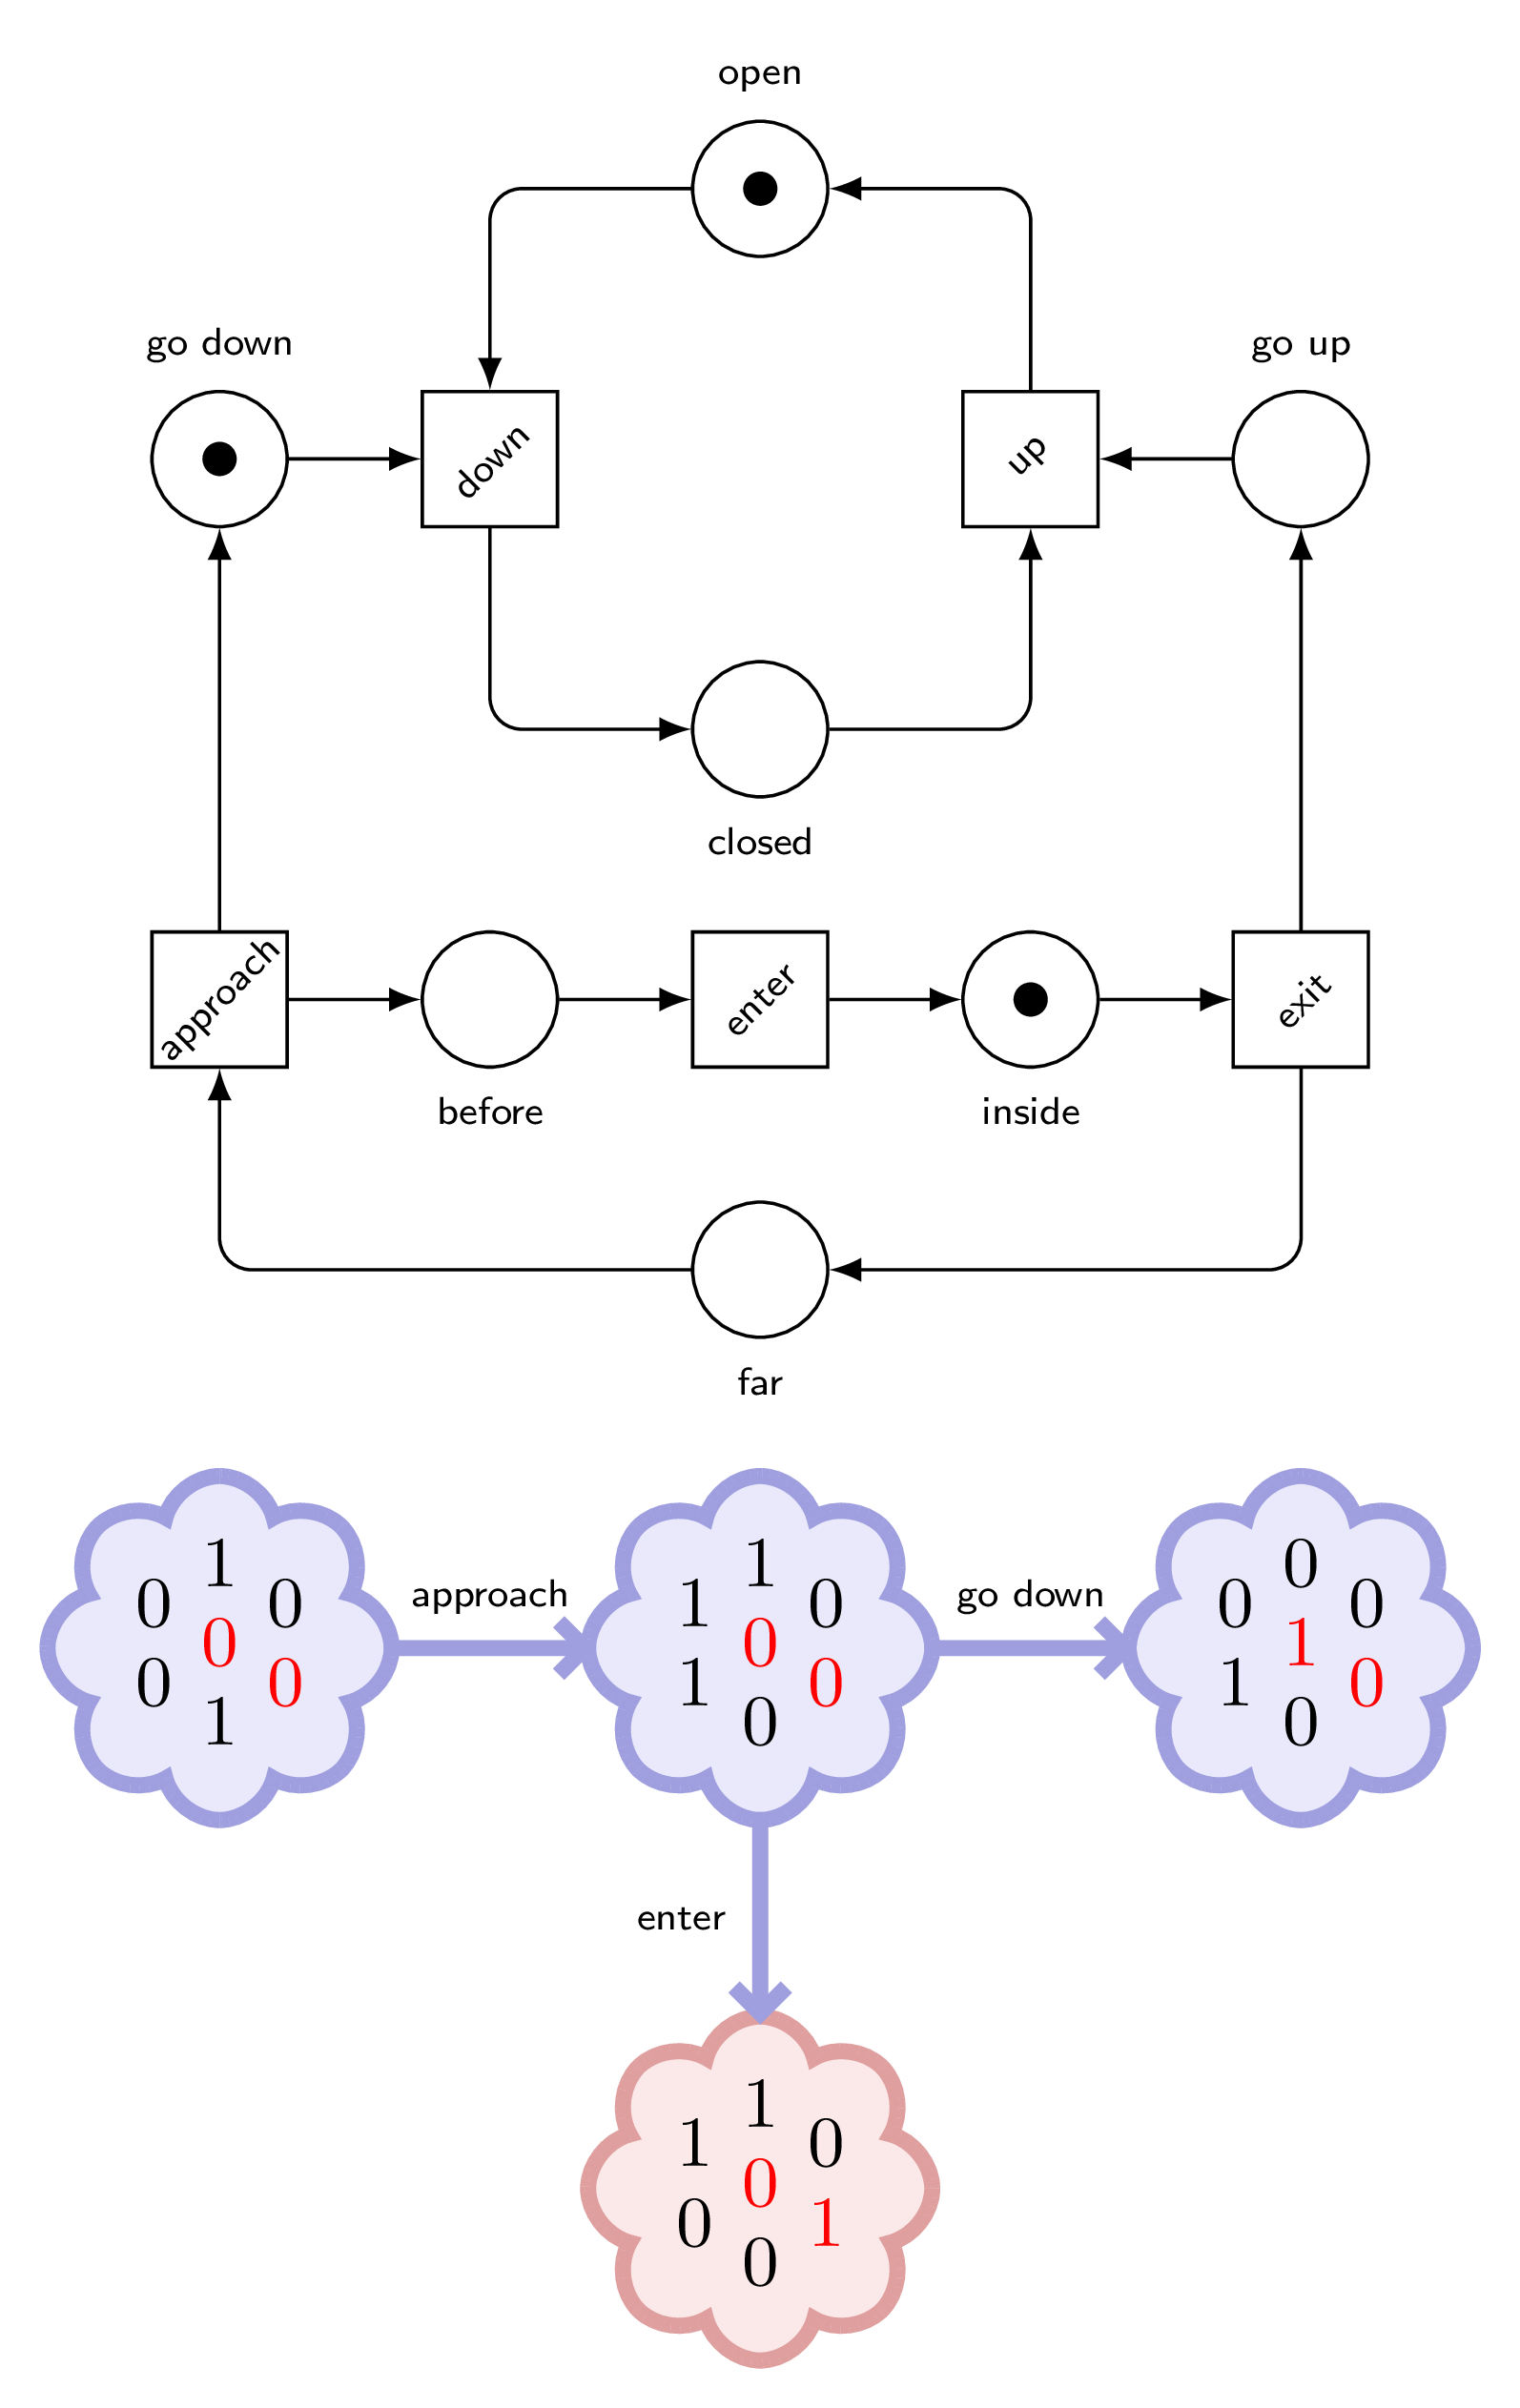
The initial marking can be depicted by the number of tokens in each place, like we did in Chapter1.
In red, we have the tow places to check (down is the upper one, and inside is the one that is outside… hum…).
Our scenario gives a simple graph.
But instead of firing only the transitions we want, let’s try them all.
We observe that at the beginning, we can only fire approach, and then down, but also enter.
Disaster!
What happened?
How is it possible?
To answer, it is enough to look at the sequence of transitions to the faulty marking.
The train approached, it sent a down signal to the gates, but they didn’t move before the train arrived between them.
Are the gates to slow? Shall we force them to close?
No. This scenario could correspond to broken gates.
But, if we cannot force the gates to close, we must forbid the trains to move forward until the gates are closed.
But how?
(Suspense…)
Ladys and gentlemen, I present you: the red light!
Under your applause.
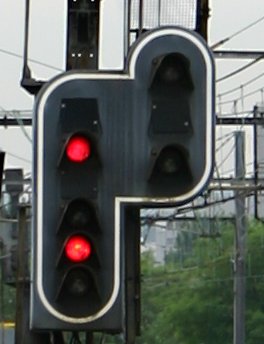
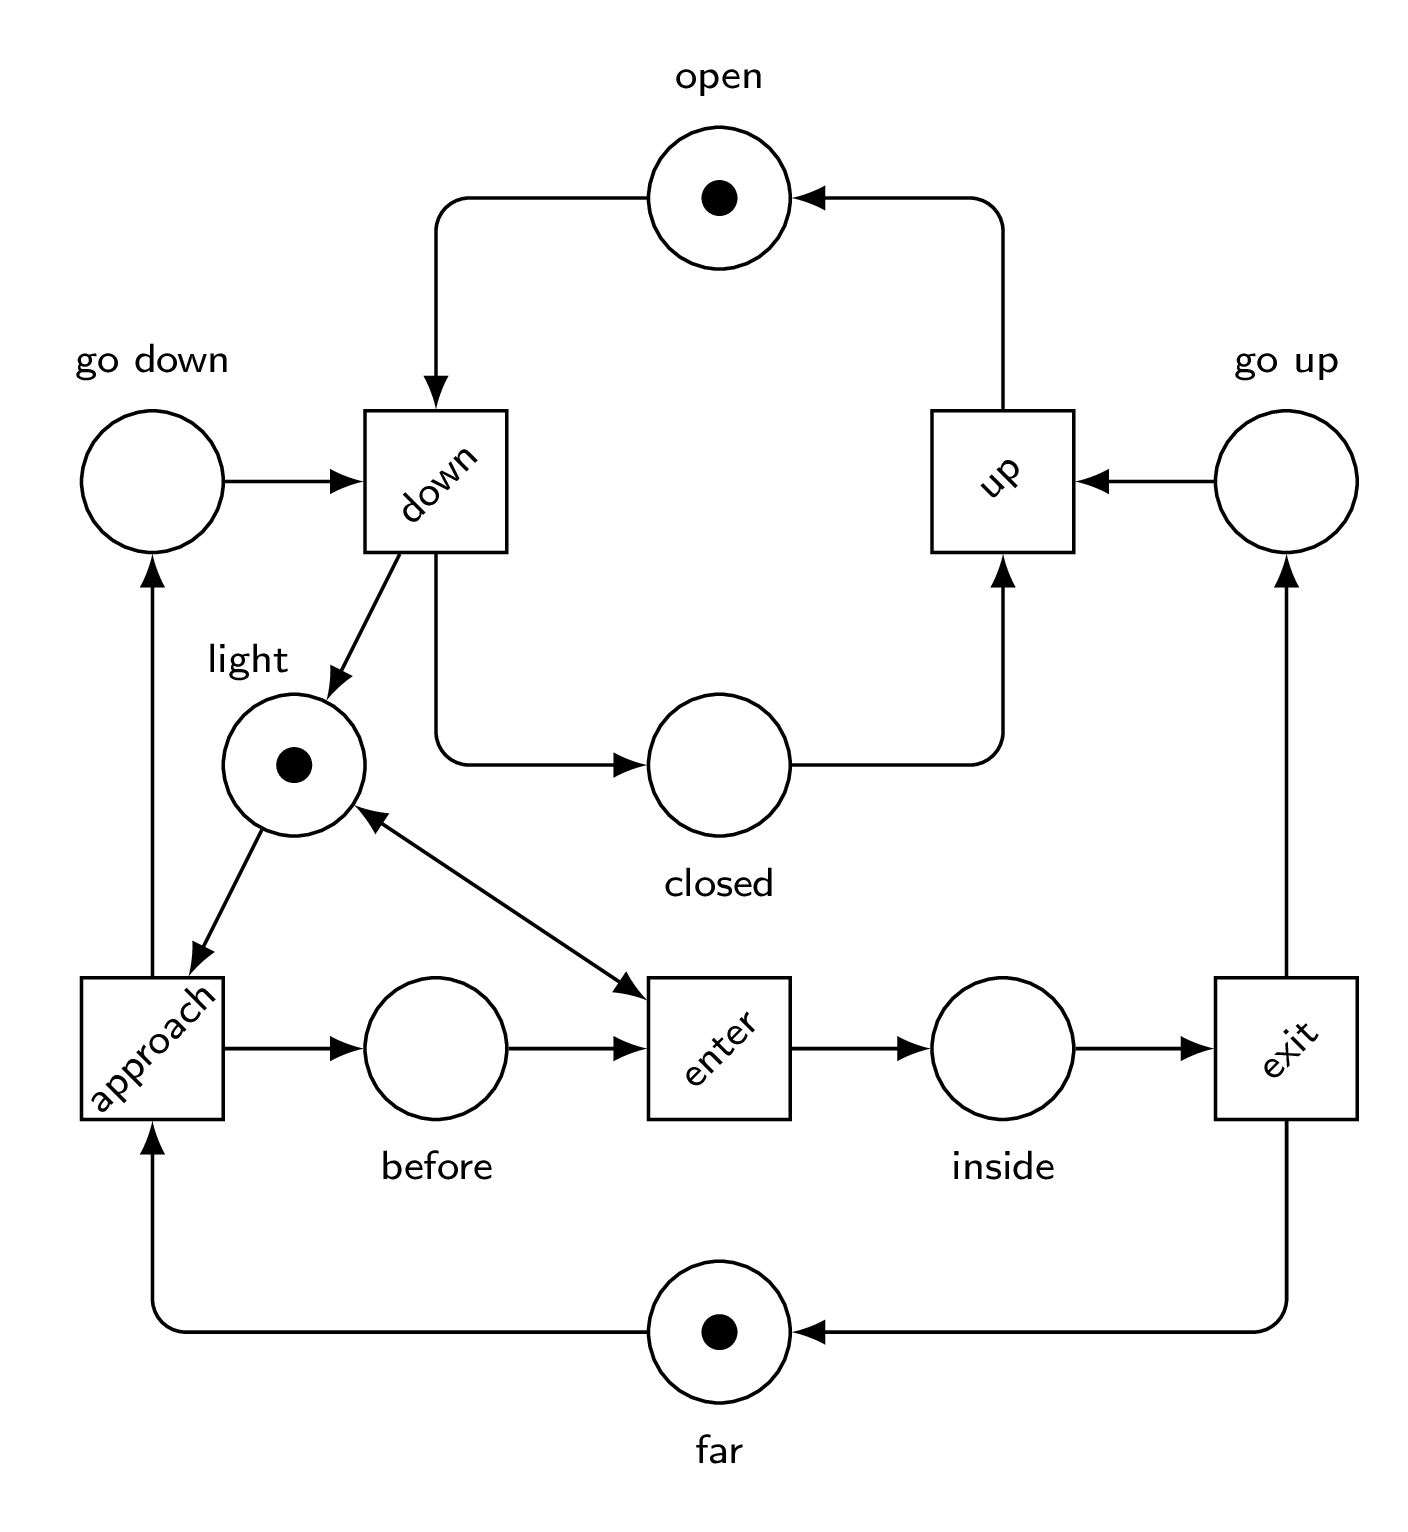
We will thus add a red light to our model: a place light such that a token in it models a green light, and no token models a red light.
When a train is approaching, it turns the light red.
It cannot cross them anymore until the light is green.
It is the closing of the gates that turns the light green.
That’s it.
Homework.
Build the marking graph and check that every reachable state validates the security property:
if inside is marked then down is also marked.
This ends out Chapter 2.